Showing posts with label construction projects. Show all posts

Tuesday, April 28, 2020

Barnwood Egg Holder Trays

I saw my first wooden egg holder tray in a magazine this week.
And I was smitten.
Of course I wanted one.  
And I could have one if I wanted to shell out $25 - $89.

Or I could make my own.  
Fortunately I already had the 1" drill bit hole-maker thingie.
And since I have smaller bantam eggs, that is plenty big.

And I had scrap barnwood, leftover from my husband's boot tray project.
(Check that out here.)
I added a regular standard sized egg in the back so that you
could see the size difference between a "regular" egg and a bantam sized egg.
Really, they do pretty well for their size.

I have to say -- drilling the holes was not that much fun.

It took a lot of pressure and my hand got tired.  
My dreams of making one for every family that owns chickens
 in the state of Missouri dissolved after about the fourth hole. 

But now I have two for myself, and a few to give away.

Sunday, April 26, 2020

My Husband's Corona Virus Isolation Project #10 -- Two Boot Trays


 With the addition of lots of rain and chickens, our mud room was looking like --
 well, a muddy room.

So my husband started the hunt for a "boot tray" where we could set our boots when we came in.

I suggested this little berry basket.
(At that point it did not have a corrugated metal insert or a handle.)  
Nope, too small for his big boots and not heavy duty enough.
But he said he would go ahead and make it for the guest cottage.

After looking at farm stores and on-line, he decided to make one himself.

 He used old barn wood that we already had.
And "Helmsman" wood finish that we already had.
And corrugated tin that we already had....
And made the nicest looking boot tray that I have ever seen.
Goodbye to mud in the mud room.

Tuesday, April 14, 2020

My Husband's Corona Virus Isolation Project #7 -- Mow-Mow House

We had two junky old sheds when we bought this property two years ago.
In the back of our minds, we thought we would eventually tear them down.
Now we have rehabbed and are using both of them!

The largest is the one that my husband just turned into a mower shed.
The JD rider and push mower have been stored in my shop,
where they took up about 1/3 of the floor space.

With all the hunting and gathering for the future guesthouse,
they even got kicked out from the shop.  The poor homeless
mowers have been under a tarp for the past few weeks.

(You can see the area to the right where he wants to put in a zip-line someday.)
With the quarantine, my husband has the time to remedy the situation.
He enlarged the opening and he added the corrugated metal overhang to account for the
rear of the rider hanging out somewhat.  It also gives it kind of a porch look.

And now, whether you like it or not -- here is the mow-mow house song from 
when our kids were little:
(sung with great feeling to something remotely resembling the tune for Ode To Joy)

"Mow-mow house O mow-mow house!
Standing strong and standing firm.
Keep our mower safe for us until we mow again in the spring!
Mow-mow house O mow-mow house."

Friday, April 3, 2020

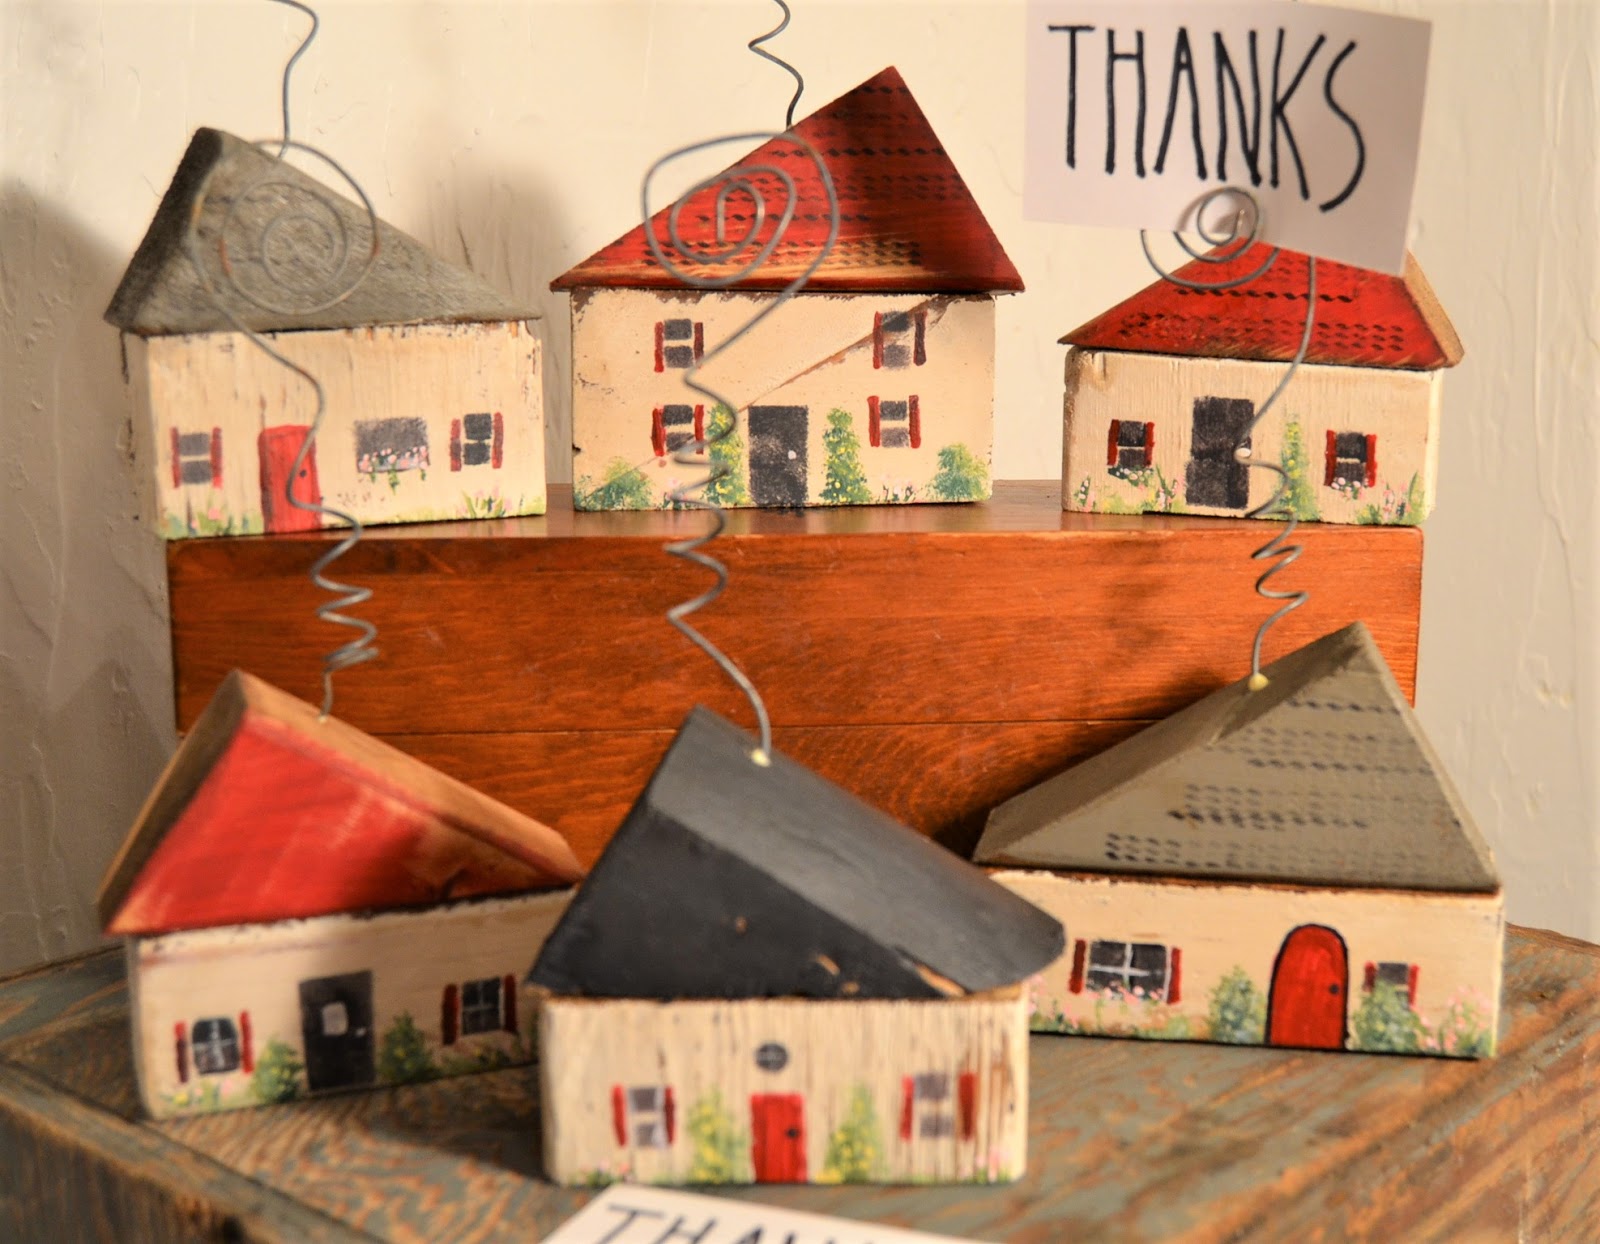
Little Houses Made From Our Little House Scraps


I have been giving some thought to how I could encourage others during this time.  
I saw something similar to these little houses on someone's blog...
and a lightbulb went off.  

With the guest house construction going on, we have a wood scrap pile!  
I won't go into ugly details, but when I went out to scrounge
the scrap pile -- it was in flames.  Drop back and punt.
These were scrap piece I had already dumped in the bottom of some large planters,
getting them prepared for spring potting soil.  
So, I managed to salvage enough pre-cut scrap pieces for seven little houses.


I gave them each some nice little details.

 Each has a nice twisty wire to hold a card or photo.
In this case, a simple thank you to my local grocery checkers,
who show up and work so hard each day.

And the back will remind them of
Spring 2020 -- the highs and the lows.

Wednesday, September 26, 2018

Live Edge Walnut Shelves For Laundry Room


I purchased three great live edge walnut boards at a flea market.
At $10 each, they were a steal. 
I used the first one this weekend.
First I sanded it, until my belt sander gave out.
Then I stained it with a walnut color (to bring out the walnut!)
The above pic shows before and after staining.

 Then I tried a danish oil finish for the first time.

My husband had made these brackets years ago for the other house.
I stained them darker to go with the walnut board.

We cut the walnut board down the center because we
needed two shallow shelves. Here is a sneak peak
after we put them up in the laundry room.
Stay tuned for a full-on tour of the laundry room.

Monday, July 17, 2017

Giant Junk Clock

I don't know where I picked up the round piece.  I am sure I was thinking of it as a table-top.  It had a great weathered look, but one piece was broken off...so it sat around in my "to do" pile for quite a while.

Even after I decided to make it a "junk clock", it took awhile to think through it.  So meanwhile I stained each piece a different shade.  Then it sat for awhile again.  My rusty junk box was very low, so I had to wait for some interesting hardware to come my way.

As soon as I saw the hinges at an auction, I liked them right away. I liked the variety, and could picture how they would look on the clock. And I added the 3 & 9 just to break things up a bit.

So far everything was cheap or free.  Short rejoicing.  I priced clock works at Hobby Lobby -- $15-$20.  I ended up buying it off of ebay for $13.  Then I needed to make a circle hole in the back to place the works -- I needed a special $17 drill bit for that.  So, it was at least a $30 investment -- which hurts my chintzy little heart.

Saturday, April 1, 2017

My First Construction Project -- Planter Box Holders

Last fall I re-painted the exterior main floor of our house.  I removed two windowboxes that had lodged under our front windows for a couple of decades.  Argh -- wood rot.  I used "plastic wood" and rocks to fill in the holes and soft areas (this is not a professional recommendation -- maybe not even a good idea). So, no more windowboxes. But I like the windowbox look so much😞...

So I bought a couple of tall metal planter stands last fall, just to give me hope that I could put together a sort of "windowbox" look.  Last weekend I took measurements and went out to buy the long rectangular planter boxes to fit inside (ouch, $17 each for ugly plastic).

I thought the plastic planter boxes were hideous, and the color did not go great with our house color.  Sigh. What if I built a wooden corral of sorts (out of the salvaged wood I used in my bathroom remodel) to set the planter boxes in?  That's the ticket!  Except I have never actually "built" anything with an electric saw, drills, screws, etc.  How hard could it be?

Harder (and more time consuming) than one would think.  Next time I would measure four times and cut once, rather than measuring once and cutting four times.  Plus I did not plan for the outward slope of  the sides of the planter box in my calculations.  In the end I had to hack off the top rim of the expensive plastic planter boxes to have them fit inside of the wooden holders.

I give myself a C+ on my first construction project.  A full letter grade just for trying.  I definitely do like the primitive look better than the plastic.  It looks pretty decent from a distance (just don't examine them too closely).  And they will look brilliant when they are planted with cheerful flowers.

Blue Hearts & The End Of My Blog

Early on during the corona virus, I did this project. When we put scalloped wood trim on the guest cottage door, we had some of the trim ...