Showing posts with label furniture redo. Show all posts

Tuesday, April 7, 2020

A Sick Rooster, Drippy Faucet & Lawn Chair Redo

Even on Corona Virus quarantine days you never know what you're gonna git.  At 7 am this morning my husband woke me up to say the rooster wasn't doing well.  I rolled over to ask him how the rooster was acting, and he pointed to a tiny bundle inside the crook of his arm.  Too sick to care he was being toted around.  Sigh.  One week of having chickens, and I was out of my depth. I made a couple emergency calls to people who know chicken charmers. Then I sent my husband out to try to round up electrolytes and VetRx.  Meanwhile I held and petted a very despondent little rooster.

(Here he is 24 hours later -- definitely an improvement).
I used a syringe to inject a little electrolyte water into Cogburn's mouth (beak?) about every hour.
Which gave me time in the kitchen to notice our kitchen sink faucet was dripping like crazy. 
We ended up tearing apart the old faucet assembly only to decide to go out and buy a whole new faucet set.  My husband did most of the work while I was trying to feed/water the rooster in our kitchen.

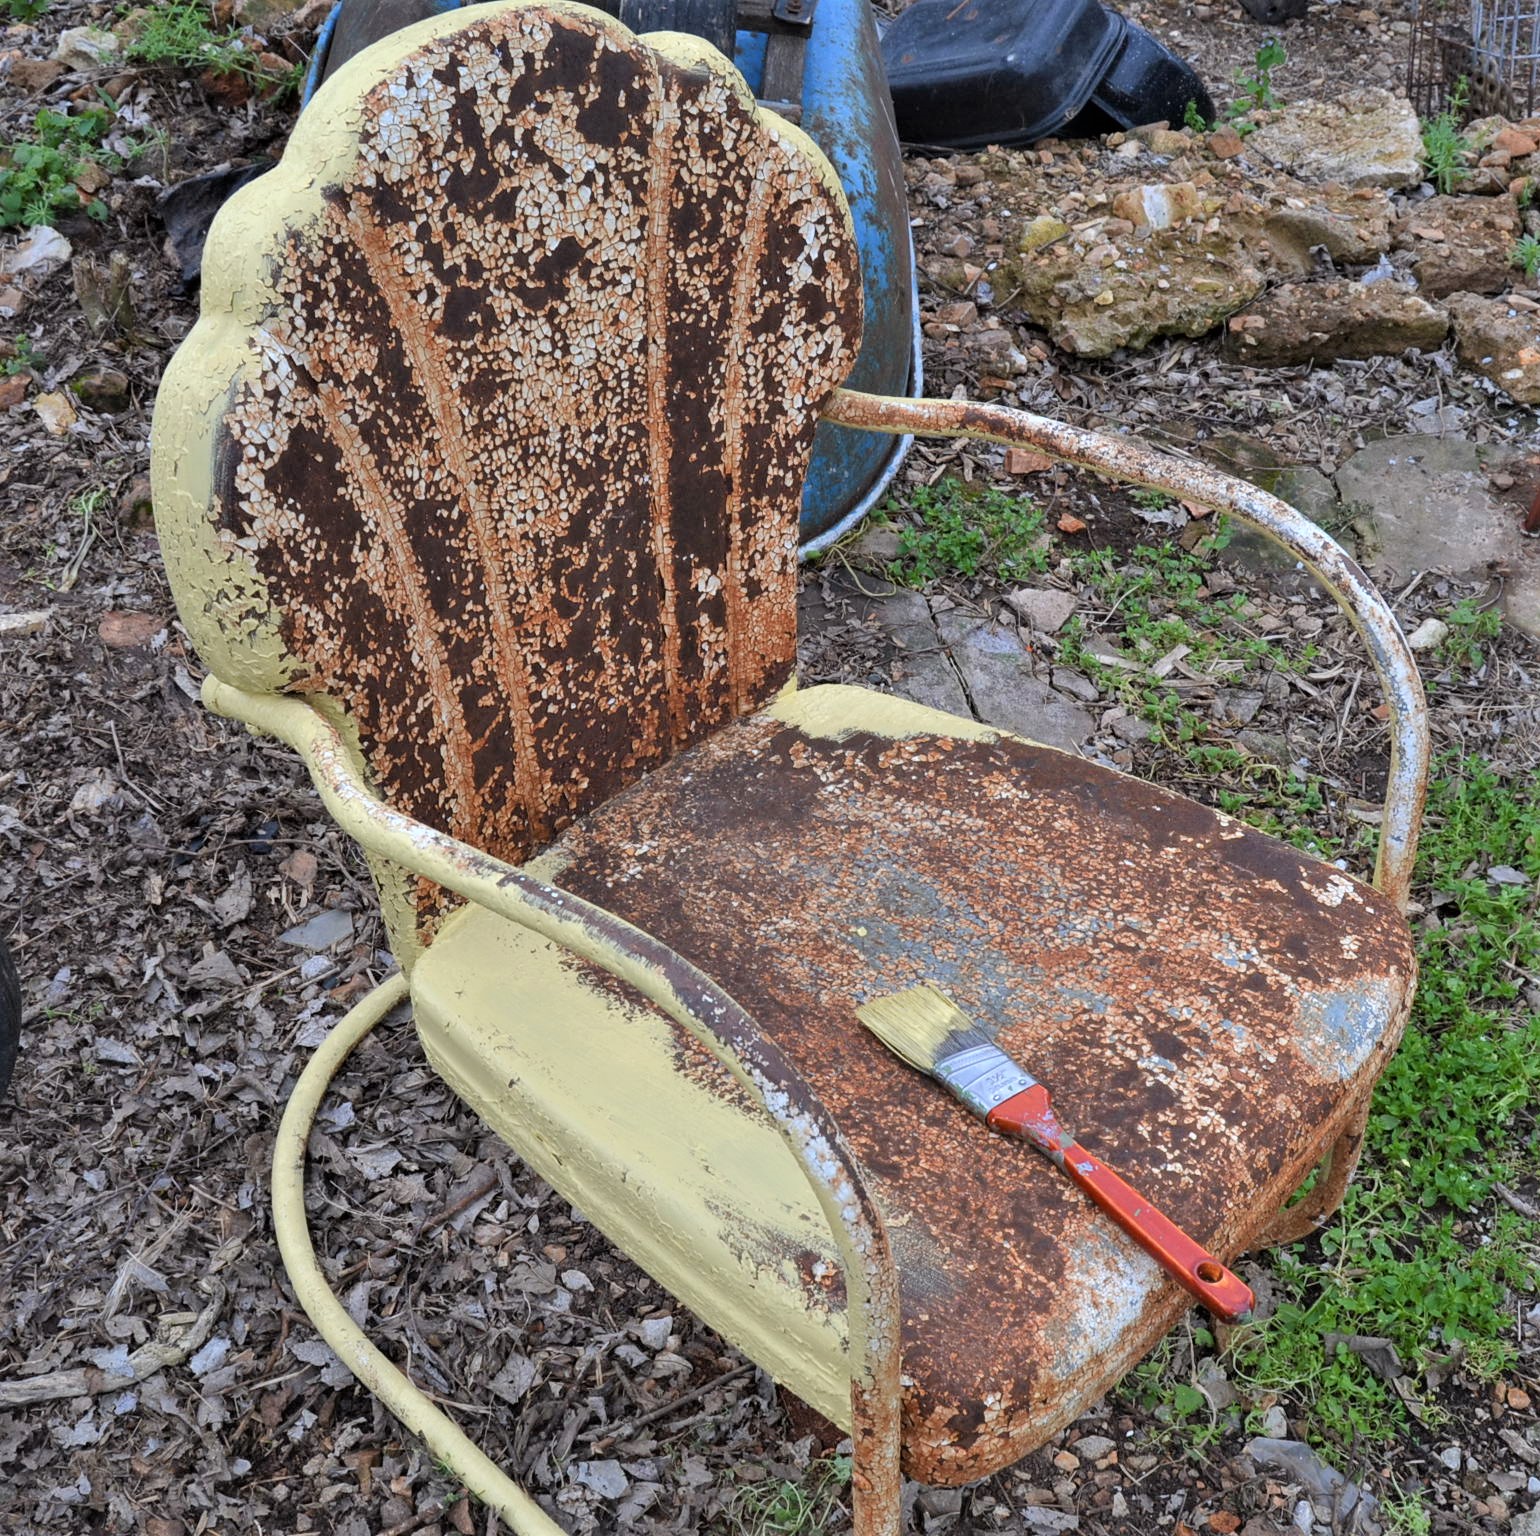
Cogburn started standing late-afternoon (instead of laying down with his eyes closed and feet curled😢).  And by that time we had a faucet that wasn't hemorrhaging.  Time to play.  My husband went out to work on his goat enclosure, and I thought I was going to garden -- but ended up sidetracked by an old metal lawn chair.  Great lines, but none of the cool old paint that I love so much.  So I decided to slap some gold paint on it.  Paint I already had (because going to the hardware store twice in one day would be politically incorrect in these times) even though it was interior paint.  I had already impulsively done a few swipes before I took the pic, but you can see why I thought it was dismal.

I am going to offend both ends of the spectrum.
The left wing "leave it the way you found it",
and the right wing "make it look like it did when it was made in 1954".
I hastily painted it with one coat, and then took a palm sander to it.
I think it is the best of both worlds -- and it inspired me.
More lawn chair rehab in my future.

Sunday, March 8, 2020

Bedside Tables Get A Tin Ceiling Topper


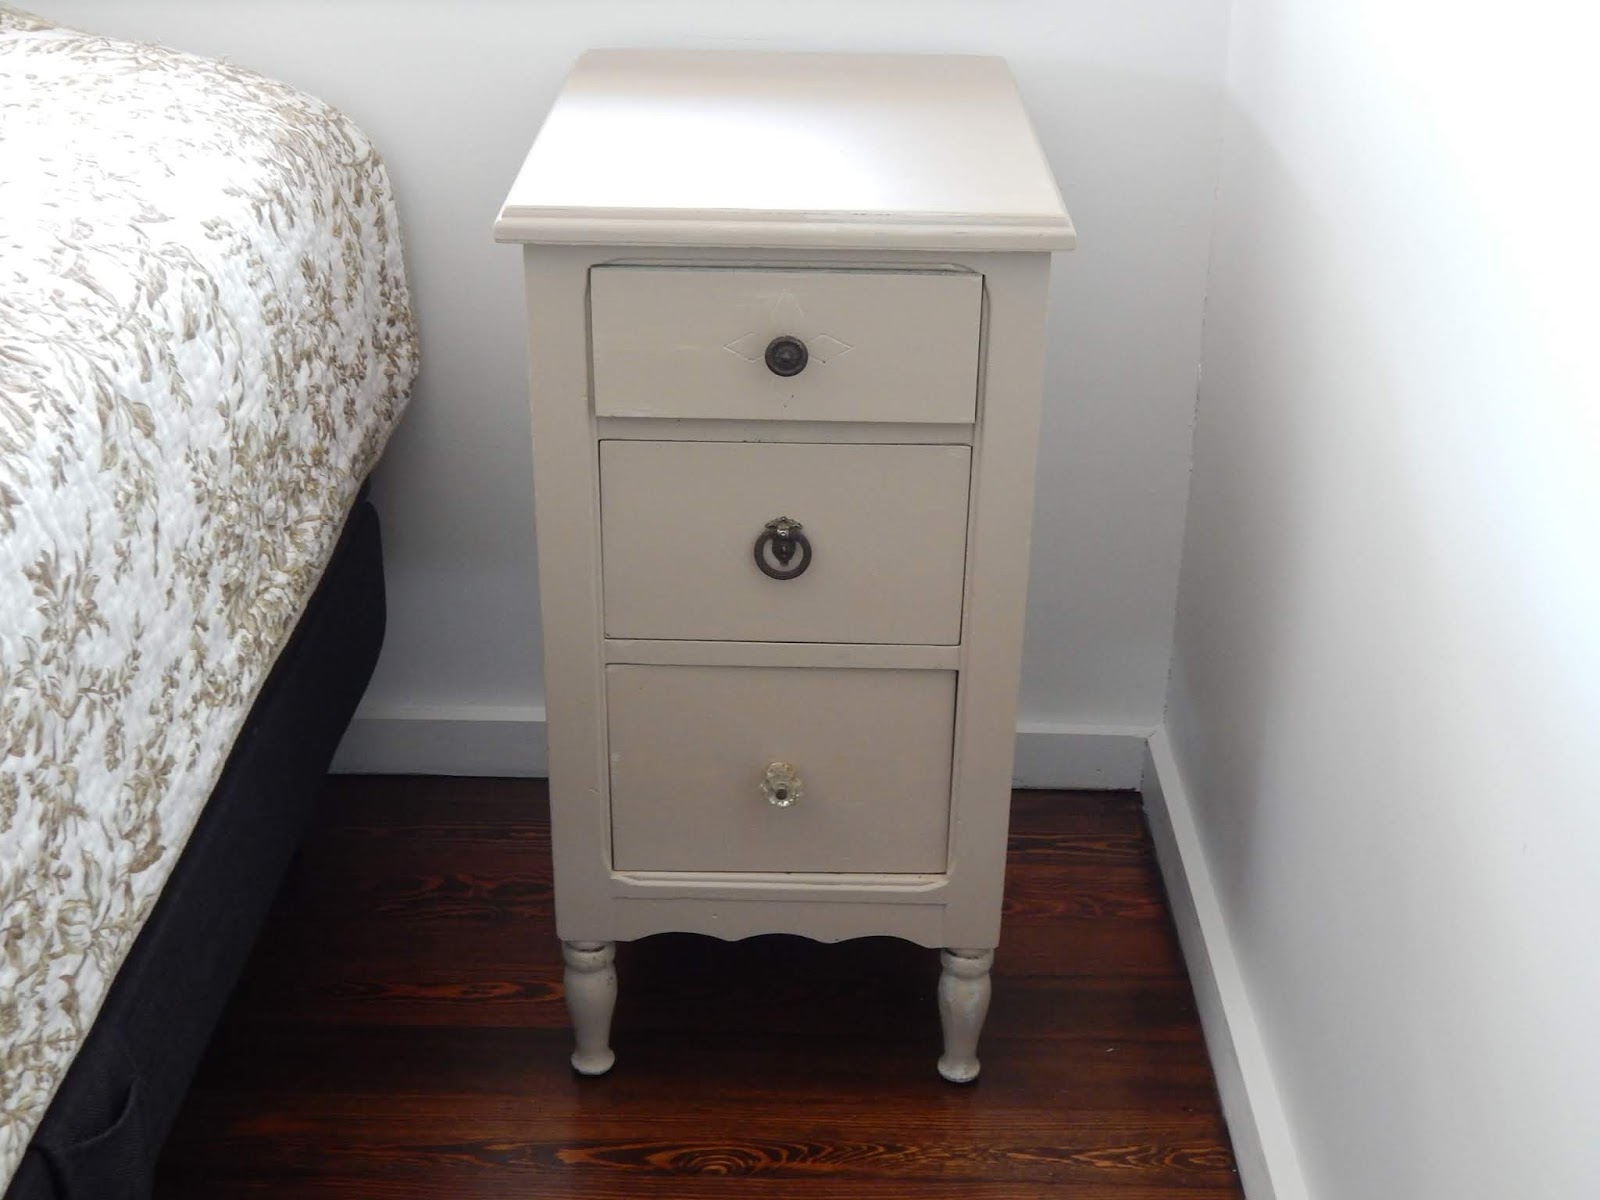
I bought these a couple of weeks ago for the new guest cottage.
They were green, I painted them a pale gray.
Then some stains bled through the new paint on top.

 So I grabbed a full sheet of old ceiling tile,
and cut it into bitsize sections.

After I pounded down the front and back sides,
I trimmed the corner sections out.

 Then I hammered down the sides.

 Love the look.
I don't think I need to nails down the sides.

Top looks great and will be flat enough for a bedside light.
Ended up not using these at the guest cottage, too big.

Saturday, October 26, 2019

Two Vintage White Dressers


 I love resurrecting old pieces of furniture.
It happened that I bought these two dressers within a
couple weeks of each other.  The above victorian
beauty has an ornate mirror that goes with it.
I knew that the embrossed design on the drawers would
really pop with a bit of paint.  

This is a super sturdy old lady.  I only needed to sand the
top a bit, and it was gorgeous with a bit of stain and finish.
Both are going in my vintage home sale this weekend.

Thursday, September 12, 2019

A Pair Of Upcycled Wicker Side Tables

My husband got this pair of wicker side tables on the last day of an estate sale.
He paid $5 for the pair.
The problem?
They didn't have any tops.
The positives?
Super sturdy construction and cute as a button.

I dug out some old boards that I had from a
deconstructed crate.  (That writing is original!)

 
I got to use my "new" saw that I inherited.
It worked great.  Then I tried a little area with a jig saw
(see crooked area on the right side -- not so great :()

I used both nails and screws to secure the boards.
And then light brown briwax over the top.
Maybe better than new.

Wednesday, October 24, 2018

Scary Table Redo Just In Time For Halloween

I bought this little white table on a local on-line auction a few months ago.  In fact, it was this table that my vintage pair of Levi's was sitting on -- that went on to sell for $689  (click here to read that post).  So the $24 I paid for this pale old girl was well worth the cost.

It went right from that auction to our chicken coop, and it has sat in the chicken shed until just a few days ago.  I want to take it to my new antique booth this weekend, but remembered it needed a little work.  Someone had hammered a thin piece of plywood on the top to cover _____.
I was scared to find out what was in the blank.  (What I should have been worried about was at the bottom and not the top!)

What I found under the plywood was the super chippy brown paint in the first photo. The oak boards were a bit uneven too, but I specialize in primitive furniture so that goes with the territory.  I vacuumed the loose bits and painted a thin layer flat white over the top.  When that was dry, I painted a thin layer of satin buff color (it matched the old paint on the legs and apron very well).  Then sanding to allow some of the old brown paint and newer white paint to peek through.  During the sanding some more of the brown chippy parts came off -- which actually helped the top blend in with the legs.  Easy, cheesy.  Call it a day.  Simply tip the table over so I can clean the legs, and then ..... EEK!.

Inside the bottom of one of the legs was an infestation of ghostly white termites.  SO GROSS.
(You can thank me for not taking a photo of that!) I put a five gallon bucket under the offending leg to catch any deserters.  My husband fetched the reciprocating saw and I hacked the crawly foot off.  Of course, I had to saw off the three innocent feet as well.  But the amputation was successful.  (Don't worry, I will purge the chicken coop before we actually get any chickens.) We will be packing up the patient and putting her in my new booth Saturday.

Friday, October 5, 2018

Coffee Table Redo


Not only does this table have awesome curves and cut outs,
it also still has it's original glass top.
I purchased it from the same on-line auction where I bought the jeans that sold for $689.
Anyway, I only paid $8 for the coffee table.

 
It just needed a little paint and distressing to show off the details.

The curves are so gorgeous.

I had a doile that perfectly fit under the glass.

Sunday, September 30, 2018

Washstand Redo & Old Age

I am plowing though my shop, trying to get it ready for my first ever at-home Antiques Sale.
We took possession of the house in March, but didn't move anything into the house until the middle of August.  Over five months of buying antiques and stashing treasures into the shop for future sales.

 I went to a great estate sale in June, bought a vanload of stuff and promptly dropped most of it off at ground zero (the garage aka "shop").  By the middle of August I had pretty much buried/forgotten the stuff on the bottom of the stash.  Which brings us up to now.  I am "rediscovering" so many things that I barely had a chance to register because I handled them such a short amount of time....
and because I am getting older and simply don't have the recall I used to.

What a great surprise to find a gorgeous washstand at "ground zero".  Just when I decided I needed some great furniture pieces for my new antiques booth!  During those 5+ months I really had tried hard NOT to buy furniture.  Too hard to get it from one part of the state to another, and too many other items that needed moved.  But yeah for me...apparently the washstand was just too tempting to pass up.

No major work needed to be done.  Thank you.  VERY dirty though.  So sanding was the best way to remedy this, and the sanding revealed a lovely oak top that I couldn't bear to paint over.  So I sanded the top a bit more, and wiped on an Early American stain.  I finished the top with a light brown briwax.

Three coats of white on the exterior, and two coats of gold on the interior of the cabinet.  A little
distressing. Then I spraypainted the original hardware and voila....

Saturday, September 1, 2018

Chicken Cabinet Redo For The Bathroom


Our "new" house is short on square footage and storage.  So we have to make the most of every square inch.  Like the space above the toilet.  For some reason our main bathroom has ample blank space in this region, so we started shopping for a vintage (cheap) cabinet that would fit the bill.
We found this blue one at a local antiques store for $40.  It needed the bottom board replaced, but that was no problem since I planned on painting it anyway.

Our bathroom is a light gray, with limestone countertop and shower.  So I painted the whole exterior of the shelf a slightly darker gray that I had in a mistinted gallon.

I decided not to distress the gray, because there were several layers of paint over an oil paint, and they might have all decided to come loose.  (I still have not come across my "handles" stash.)

But it still looked a bit plain....
While unpacking I came across three 1920s Poultry magazines that I had kept to decorate the interior of the chicken coop.  (Yeah, you heard me right.)  But I figured that we would enjoy them more inside the house.  So two of the covers went on the exterior of the doors.  And some of the great magazine articles, ads and illustrations went inside the open shelf.  As usual, I did not have the right decoupage supplies -- so I "glued" and sealed it with clear polyurathane (not ideal).

I painted the interior with white oil paint so that it would clean easily.
And of course I already filled the "display" area with chicken & bird decor....


Thursday, August 30, 2018

Update On My Buggy Hickory Chairs


Ok,  so you remember my post Tips on Getting Rid of Wood Eating Bugs (click here to view that post), specifically for those eating four hickory chairs that I purchased. When we last visited about them, I shared that I had painted a borax solution on them and later sprayed them with insecticide.  I "baked" them while sealed plastic on the basketball court of the old house for two days AND then on the back deck of the new house for at least two days, but the second day we had rain.

(See some of the insect damage on the chair in the above pic).
So we threw them in the empty van, still covered in plastic.  We parked the sealed van in the hot sun for several days (stow and go seating, got to love it) until I could get to them.  So I did all I could to kill those little buggars.

(See insect exit hole in above pic.)
I finally removed the plastic sheeting and I used a wood stain on all exposed wood.  Then spread a nice white sheet in the back of the van and plopped the chairs on it for two more days in the hot sun.  (We have another vehicle so I did not need to drive the van during this time).  The white sheet was there in case there were any critter sawdust, it would be easy to see.


The big reveal was today.  ONE of the chairs still had tell-tale signs of powder post beetles.  I did not have it in me to repeat all the procedures I tried, so in the burn pile it goes.  TWO of the chairs were invited into our tiny living room, and blend in great.  The last chair I will sell, and hope to recoup the money I spent on the chairs, the insecticide, the 55 gallon trash bags and the stain.

Monday, August 13, 2018

Tips To Getting Rid Of Bugs Eating Vintage Wood


What in the world is going on here?
Slow death.
I hope.
I bought four hickory arm chairs at a yard sale Thursday (for a song).
I am starting to be drawn to hickory furniture,
the kind that still has the bark on it.
(Look at the "Old Hickory" furniture website for inspiration.)
I put them on my front porch, because I knew I was going to a flea market
on Saturday and might need the room in the van.  After that,
I could just load them back in the van for a trip to the "south house" next week.
Then on Friday I spied sawdust on my red porch.  What?
Further examination showed all the chairs suffered from some overnight "chewing".
YUCK!!
On-line research led me to believe it is powder post beetles.
Many suggestions on getting rid of them,
the most thorough being burning the furniture (which still may happen.)
But here is what I am trying first:
1.  My first step was mixing up a solution of borax and hot water.
I painted it on the wood with a paintbrush.
That seemed pretty simple, cheap, and non-toxic.

2.  But I spent more time on-line and got more paranoid.
I don't think the borax solution can soak in because of the bark.
So, I bought a spray from our neighborhood hardware store that
is supposed to kill ants and termites.
But will it kill whatever is eating my chairs?

3.  Which brings us to "baking".
Bringing the wood to 135 degrees for several hours should kill all bugs and eggs.
On-line research showed men devoting quite a bit of money and time setting up
elaborate ways to heat up their wood (insulated cages with heaters, "kilns"
made from junk wood with wood burning stove inside).  The suggestion to put
them in an attic all summer was a simple one, but our attic doesn't have a hole big enough
and we are MOVING IN A WEEK.  So I bought giant black plastic bags to cover them.
 Side note:
Men love discussing "or" scenarios.
Who would win in a fight, batman or superman?
If you are stopping your car for a short time in the summer --
smarter to crack your window or leave them rolled up to keep the car cool?
(I ran across this one while doing research, the answer is rolled up).
It did not surprise me therefore when a large group of men were very 
interested in my own "or" scenario at the hardware store.....
Which would raise the temperature of the wood more:
putting the black plastic encased chairs in my van with the windows rolled up or
on a basketball court in the direct sun?
After much speculation (which is really what "or" scenarios are all about)
I went home and put them on the basketball court.
I am going to leave them there for two hot, sunny days and then check on them.
I'll let you know:
burn or save?

Thursday, August 2, 2018

Old China Cabinet Gets Facelift


I mentioned a few days ago that I had started to work on this china cabinet (click here to read that post). We bought it back around 1986 from a little old lady whose husband had made it for her.  We paid $75, which was a lot of money for us.  I was thinking that for our Ozark house I wanted something older and more primitive to put dishes in, but frankly that is not in the budget right now.  

 After three coats of paint, I was ready to distress.  Except my palm sander was at our other house.
All I had was a sanding sponge.  I did what I could with that, but was not satisfied.  
Then I used a razor blade.  Better.  Then I used a butter knife, and got the best result.
 I then did a quick wipe-on, wipe-off with a coat of light stain.  This just aged the piece a bit,
and gave a little more color variation.  


I had purchased a roll of wallpaper off of ebay, to paper the back of the cabinet.
 Just to shake things up a bit.  
Unfortunately, when the paper came it was not pre-glued.  So I used clear polyurathane
(because that is what I had, and didn't want to spend any more money.)
It acted as a very good adhesive, though I wouldn't recommend it normally. 
I am not putting the shelves in or back panel on until the piece gets moved down south.
Which is also where my hardware stash is, so the drawer pulls will have to wait.
 So no staging for a final photo, but it still is a beauty.

Monday, July 23, 2018

Whining, Japanese Beetles, God & Paint Therapy

Some periods of life are just hard. Hard.  Can't get around them, have to make it through somehow.  Hard.  We're going through one of those.  Long and hard.  I thought our northern house would have sold by now, so now I am hours away from my husband (and grandbaby!) babysitting our Victorian house.  He is job hunting in the new location and I have put almost all my money-making "junking" ventures on hold during this transition.  Which means we are cash poor.

Nope, I am not done whining...  The temps and humidity this summer (since June!) make it feel like 100 degrees almost every stinking day.  Our northern house hasn't seen any rain in weeks.  Lots of grass is dead, some trees looking bad, and I am watering almost every morning.  I have started to collect "gray water" during the day to water potted plants.  So I was watering this morning and I noticed Japanese beetles eating my crabapple tree (probably the photo "frame" of flowers you are looking at on my blog right now is a photo of blooms from that tree).  Japanese beetles.  Argh.  So gross.  So discouraging.

 Must go to Home Depot and spend money on JB traps.  (I think God had a plan). I picked up two, and wandered to the paint department.  I had kind of been thinking about painting our china cabinet.  We bought it back around 1986 from a little old lady whose husband had made it for her.  We paid $75, which was a lot of money for us.  I was thinking that for our Ozark house I wanted something older and more primitive to put dishes in, but frankly that is not in the budget right now.   So I was perusing the paint samples, and found a lovely shade of gold by Behr -- Romanesque Gold.  I pulled the trigger and bought a quart.

I dragged the china cabinet on the back porch, did a "primer coat" with a white chalk paint.  Then a coat of the gold with a little of the white chalk paint added (to kind of layer colors.)  And then a coat of the straight gold.  During these three coats my nerves began to calm.  I began to count my blessings, and remember the joy and peace God grants me while I paint.  God is teaching me all sorts of lessons during this season of my life, and sometimes I lose sight of that.  It is EASY to see the hard, and much tougher to see the good.

I have a few more stages left before I finish the china cabinet (stay tuned), but today was a good start. And I am feeling better. By the way, the vicinity of the beetle traps looks like a Alfred Hitchcock horror movie "The Beetles"-- apparently the bait really does work.

Sunday, May 20, 2018

Bedside Tables Furniture Redo


I bought a pair of these bedside tables from a local on-line auction.
I paid $22 each, which is more than I would pay if I were to 
want to fix them up for resale.
But these were for us,
to go on either side of our new bed.
I think they started life as a dressing table,
but I like them better separated anyhow.

Two coats of a light tan chalk paint,
and good to go.
Decided not to distress,
the tan turned a little yellowish when sanded.

Tuesday, March 20, 2018

Recreating Aged Layered Paint On Old Bistro Chairs -- Day 17

I was right yesterday.  Two coats of white paint,
on already white trim in the sunroom,
did not lend itself to good photos.

So I took pics of two bistro chairs that I worked on today.
They will go in a small corner in the kitchen.
The one on the left is shown "as found".
The one on the right I hit here and there with a pale green color.

 After the pale green dried,
I added a dark green covering most of the chair.
Then a little sanding to distress.
Followed by a wood stain, brushed on and
immediately wiped off.

Both chairs are now ready for a cozy eating area in the kitchen.

Blue Hearts & The End Of My Blog

Early on during the corona virus, I did this project. When we put scalloped wood trim on the guest cottage door, we had some of the trim ...