Saturday, April 16, 2016

Feather & Fur Flea Market Finds -- 4.15.2016

I went into this weekend knowing it was my second biggest buying weekend of the year.  That I needed to be well prepared, gassed up, plenty of cash...none of which happened.  Despite some amateurish slip-ups I still got quite a few good finds.


(I actually know all of the people that I got to pose for my photos this year.)
The newspaper I looked at advertised the small town "Swap Meet" for Saturday and Sunday.  I just happened to be travelling to an out-of-town garage sale Friday morning (not even super early) when I saw that most of the flea market was set up already!  ARGH!
They said that the vendors and Craig's List got the "correct" Friday morning start date.

This young man agreed to deliver my newly purchased "general store"
display case (resting under the blanket) to my vintage
decorator store location. 
Yes, I bought the wire basket too.

This little cutie (the short one!)
was in my "fur, feathers & flea finds"
post from this flea market last fall (click here to see that post.)
(Click here to read the "fur, feathers & flea finds" post from last spring.)

As always, there was a plethora of farm
animals and birds to distract.

My husband chided me for the picture being
upside down, but I just purchased it for the frame.

Love the crusty animal feeders I find there.
I haven't found any quilts in quite awhile,
and this weekend I picked up three.
This X-stitch one is the only one I have a photo of.

Two great sets of antlers, homemade duck decoy
and aluminum cooler.  My aluminum coolers are
starting to accumulate.

We are crazy for croquet,
so loved the piece from an old box.

Most of what you are looking at will
become planters or garden décor.

I am going to (hopefully) take off these little metal
conveyer belt scoops and use as planters.
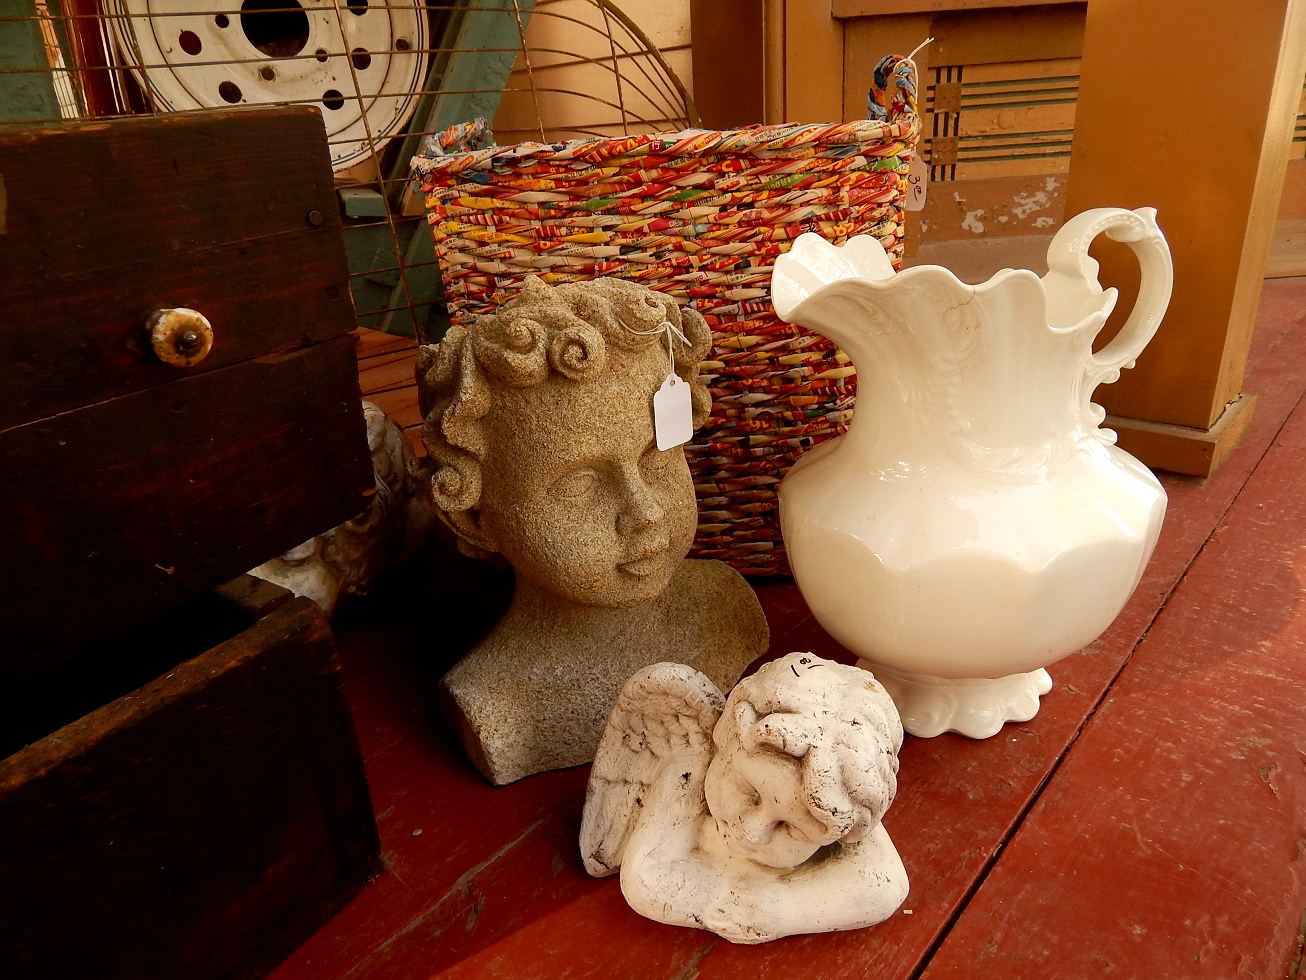
The basket upcycled from paper was purchased
by my mailman about an hour after this photo
was taken.  He does get first dibs, and great prices.

I don't know why these guys are lollygagging
around when there is so much pricing to be done.

Floor grates, so beautiful.

Stack of wonderful metal items.
What I REALLY needed were bigger pieces to
display on.  I picked up three dreamy ones.
Stay tuned for that post.

Thursday, April 14, 2016

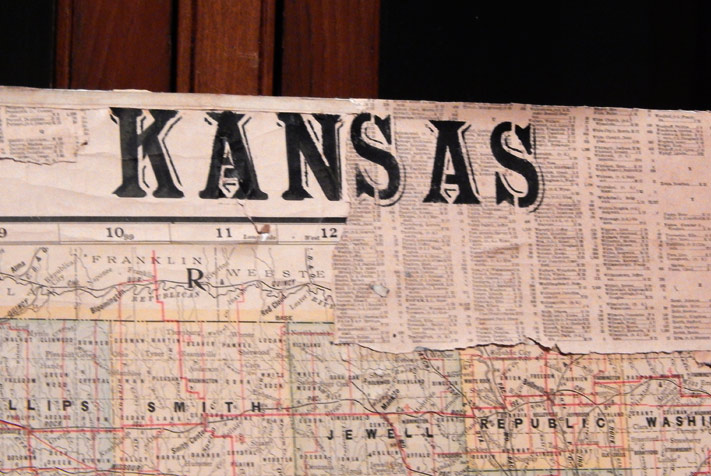
My Journey With A Vintage Kansas School Map

I went to a Kansas auction in the middle of March.  It was something of a dud, but it is a slow time of year.  I did manage to snag a bedraggled pull-down school map of the state of Kansas.  LOVE.

It's pull-down days were long over.  It needed to rest in a stationary position.  And it needed some good back support. (It is sounding a lot like me!) Since I only paid $2 for the map, I decided I could afford to go to Hobby Lobby to buy a giant Quick-Stick Foam board (peel-off sticky on one side) which sells for a painful $15.


Here are my Easter figurines holding down bits and pieces of the glued map.
Even rolling the brittle map out carefully, there were plenty of tears and holes.  The top had a lot of damage, and needed the most repair.  I used parts of the bottom to repair / fill in the missing areas, kind of like a Kansas patchwork quilt.  I had to do this in other smaller areas of the map as well.  Lots of glue, in addition to the foamboard adhesive. 

I stenciled the "KANSAS" on the top.  The whole look is a little primitive, but it is salvaged now for a future project. Found out the end of the journey with the map by clicking here.

Wednesday, April 13, 2016

Four Panel Vintage Window Wall Hanging

It wasn't too long ago that I created two wallhangings from vintage windows and adhesive stickers made for walls, click here to view that post.  I purchased this great window from my Nebraska buying trip, and knew that the four panels were just begging for some "window dressing".

I paid more than I had wanted to for the window, so I needed to be cheap when I did the embellishing.  I bought two wall/window décor adhesives from Dollar Tree.  I cut one into three words:  LOVE, LAUGH, LIVE.  And I cut off the "extras" from the DREAM adhesive.  Word of caution:  the LIVE, LAUGH, LOVE all had separate letters, so be sure to apply them in a straight line.

The words were all too light, so I needed to lighten the back side of the window to make them pop.  Last time I used paintable embossed wallpaper.  This time I simply painted two coats of chalk paint on to the backside of the glass.

I really like the ease of painting the back of the glass.
I would definitely do this treatment to another
vintage window wallhanging.

Monday, April 11, 2016

Batch #2 Of Vintage Planters To Sell -- Metal Pails

Batch #2 of vintage planters this year:

If I decide to add color to planters this year,
I am going with red, shades of green and gold.

This batch has a couple of common themes.  Small pails and succulents. After sticking a horse shoe randomly in one of them, I am in love with the idea.

The black stripe was just begging for an embellishment, so I purchased some waterproof stamping ink.  It has kind of a chalk look to it.

And made my second fairy garden of the year.
This fairy is Dutch and has a little dog.

Friday, April 8, 2016

Vintage Metal Headboard Garden Decor

I wrote an earlier post on how I decorated a four panel window with Dollar Tree Wall Adhesives, click here to view that post.  It occurred to me at the time, since the "LIVE, LOVE, LAUGH" adhesive was all separate letters how easy it would be to spraypaint over the letters and then remove them. 

One of  the other purchases from Nebraska lent itself well to this project.  I turned this little metal headboard (or footboard, who knows?) upside down.  That way the large metal panel was closer to the top.  I  taped off the edges.  I made black lines to keep the letters straight and then applied the adhesive letters.  The letters are a little forgiving, if you tip one a bit too much you can remove and straighten it.  I should have pressed the letters down gently before applying spray paint.  I ended up doing two coats of flat black spraypaint (you can get generic cans for $1 at Walmart, Lowe's).  Wait until the paint is very dry before removing letters with tweezers.

You may have noticed my old concrete garden gnome.
I talked a lady into selling it to me a few years ago,
it has become my favorite garden decoration.

Thursday, April 7, 2016

Tall Cabinet -- Furniture Redo "ROSALINE"

I spied this little piece at an auction last Saturday.  It is the ideal size piece that I am looking for in furniture.  It had been mostly "stripped", years ago.  It sat around parched and naked for decades.  I thought it was hidden well behind the sad abuse, and maybe no one else at the auction would see it's potential.  I should have known better.

I obviously did bring it home, but not for a song.  But it proved such an easy "redo" that I am so glad I got it. 


The drawers still had some paint on them.  The wood did not look especially beautiful that was showing, so I opted to paint the whole thing.  Two coats of white chalk paint and a little distressing.   It was such a blessing to have no hidden problems.

Even finding new (old) hardware proved easy.  I had it in my stash already. 

This is the kind of easy project I love to do.
I'm naming her "Rosaline".

Wednesday, April 6, 2016

Saturday's Vintage Finds 4.2.2016

A double header day -- a good garage sale (in 35 degrees) followed by an auction.  The day ended with a van load of assorted vintage items.  The merchandise is headed several directions -- ebay, my vintage booth, and a couple of things got dropped off immediately at the Outdoor Booth:

This "Triple Effect" gas parlor stove had
green enameling on it that was gorgeous.
My husband was a good sport about hauling it.

I got this cool old wicker chair for a song,
and passed on the savings to a lucky customer just two days
after the auction.

These are metal art deco table legs.
Paid $12, sold for $144  on ebay.

They are going to be on ebay Saturday afternoon.
  
I purchased this set of three original vintage floral watercolors.
 
 I loved the colors and the amateur flair.

Monday, April 4, 2016

Spice Cabinet Turned MISS MUSTARD SEED Pie Safe Lookalike

My dad would call this project piddling.  Spending way too much time on a project that is not going to have much financial reward.  Saturday I attended an auction, and brought home an ugly spice cabinet which came with something else that I actually did want.

Yesterday I looked up images of upcycled spice cabinets, there were some cute ones -- but none that really rang my bell.  (This was already considered "piddling", because there was a whole van load of good stuff to sort and price.)  THEN, last night I caught Miss Mustard Seed's blog post on redoing an old pie safe -- click here to view that post.

LIGHTBULB MOMENT.  I think I laughed out loud.  I went to sleep thinking how I could stage my "pie safe" to look like hers.

First I tore off the top curvy piece and used a saw to even out the side pieces so it would sit flat (which it still didn't -- so I had to McGyver something, but not important to this post).  So, at this point the bottom became the top.

I then spraypainted the exterior with flat white, including the screens and drawers.  Two coats, and a light sanding to distress just like MMS did. 

Thank you, Miss Mustard Seed for not painting the inside of your cabinet. All I had to do to the interior was cut the top curvy piece to fit inside the cabinet to make a top shelf (after all, my spice cabinet had only two shelves and her pie safe had three).

Then the fun.  (MAJOR Piddling).  I drug out any little thing that vaguely resembled what MMS had in hers.  The difference of course, was that my "pie safe" was only 12" tall.  I even tried to get the same type of background and rug.  Yeah, her photography is way better, but you get the idea.

Here it is the way it would look if I were going to keep it.
 
This is a photo of my mother when she was little.
Love the lid on the "sugar" bowl,
that was very similar to Miss Mustard Seed's ironstone lid.
Time to actually get to work...

Friday, April 1, 2016

Vintage Junk Succulent Planter Tutorial


A.  Look for cheap ($1 or less each) vintage containers to use as planters. Metal is my favorite.  Not too big, or it is too heavy to haul around.   Not too small, or people won't purchase them.  Just right.
B.  Poke holes in the bottom if they don't have holes already (I use a hammer and nail).

C.  Put some "junk" in the bottom for drainage.  Black walnuts, clay pot pieces, small rocks, leaves and items found in your compost pile.

D.  Fill with dirt from your compost pile.  I maintain a compost pile year round.  Mine is a "cold" compost pile, which means I am too lazy to mix it up and add the right amounts of sand, "green", etc.  Mine has two sides.  I use one side each year to stack leaves, gardening leftovers, etc.  The other side has the thick, rich compost left from the year before.  Anything that hasn't completely composted I put on the leafy side.  The finished compost is enough for all my retail plantings.  I do not mix potting soil into this, because it raises my cost of each planter. 

E.  Plant a couple types of succulents into the pot (your succulents should take up about half of the pot).  Keeping in mind that they will grow and spread somewhat.  I maintain a primary succulent bed and several satellite beds.  I try out different types of succulents every year.  They need to spread (be fruitful and multiply) so  that I can "harvest" the edges. 

Different colors, textures and heights are good.  Ideally they also need to make it through the Midwest winter.

F.  Plant a flowering annual in the pot.  I always use dianthus or rose moss.  (I just bought a 6-pack of dianthus for $1.75 at Walmart.) Both do great in high heat, direct sun, and very little water.  Both bloom for months.  Sometimes I actually have dianthus overwinter.

G.  "Mulch" with small pebbles, available in a huge bag at your garden center for $5 or less.  Cover all the bare dirt and lift plant leaves to mulch under them.  This helps hold in the dirt and the moisture, plus it gives a nice finished look.


H.  Water each container thoroughly.  After this, they generally only need watering once a week.  Twice if it is super hot.


I.  There might be some bare spots, which need a little interest.  This is a great opportunity to raid your junk stash.  Last year I used a lot of rusty metal items for filler.  This year I'm leaning toward rocks and shells.  Other items I have used:  broken porcelain doll pieces, game pieces, tiny glass bottles,  marbles, ceramic animal or bird figures.


J.  Clean off the outside of your pots and price them.  I use old spoons to write prices on, they don't blow over and water doesn't damage them.  My vintage store that I sell the planters at keeps the spoon "price markers" for me, so I can recycle them.  I try to sell most of the planters at a mind-blowing $9, I can only do that because I keep the costs down. 

Blue Hearts & The End Of My Blog

Early on during the corona virus, I did this project. When we put scalloped wood trim on the guest cottage door, we had some of the trim ...